Tuesday, May 31, 2011

Coming Out (When, Why, How Far)

Doug, a men's league goalie in his forties that I work with occasionally stopped me in the middle of our last lesson and asked me a very basic question, "when should I be in my stance?" 

An easy answer to this question is that anytime you might take a shot, you should be ready in your stance.  This answer might suffice if things didn't change so quickly throughout the course of a hockey game. I have developed a very basic system to ensure you are always at the appropriate level of preparation.

When the puck is at the other end of the ice, beyond the red line, I suggest you relax comfortably, but still follow the play with your eyes, watching for possible outlet passes, and ready to alert your D of any cherry pickers sneaking past them.  Once the puck crosses the red line to your half of the ice, it's time to get into your goalie stance and prepare for a shot.  It doesn't matter if your team has the puck, or the other team, if the puck is in your half of the ice, it is always best to be in your stance with your stick on the ice, knees bent, and hands ready.  It is not yet necessary to come out on an angle yet, because you should be able to stop any shot from beyond the blue line without an issue, no matter how deep in your net you are.

Once the puck crosses the blue line, it is time to DRIVE out on your angle.  I see so many goaltenders C-Cut, skate, or telescope out to meet the play, and this is simply too slow.  Use a single T-Push, and DRIVE straight out towards the play as it enters the zone.  If it is an average speed break, like a 3 on 2, for example, you do not need to come out past the top of your crease.  If it is a breakaway, I recommend taking two additional C-Cuts out past the top of your crease.  This additional distance gives you time to match the speed of the shooter, a key to stopping a breakaway.

Once the puck is in your zone, there are really only two skating maneuvers you will ever need to use to follow it effectively: T-Pushes and Shuffles.  The T-Push is used to follow a pass, or to come off your post to follow a skater.  The key to a good T-Push is leading with your hands, driving hard with your pushing leg (power leg) and stopping quickly with your other skate.  If the right leg pushes, the left skate stops us and vice versa.  No exceptions to that rule! 

This goaltender is demonstrating how to lead with your hands on a T-Push.

The shuffle is used to follow a player skating with the puck.  When we shuffle, every part of our body stays square to the puck, from our pads, to our shoulders, to our hands.  The best way to think about a shuffle is a small, quick adjustment to stay square to the play.  Long shuffles lead to big holes between the pads, and slow reaction times.  By keeping your shuffles short and crisp, we always have both feet on the ice, and can easily drive in any direction.  When shuffling or T-Pushing it is very important that your head and shoulders DO NOT bounce up and down, but stay very still and even.  Your knees stay bent, your hands stay the same distance apart, and your stance stays in tact.  You simply move your stance efficiently.


In this video, Ronan Mobley shows proper shuffling technique.

Now let me save you a goal or two in the future: Often once our D has taken control of the puck, we relax and come out of our stance, or stay on our goal line as the D starts the break out.  This lackadaisical attitude leads to countless goals when our D is dispossessed by a forechecker, or makes an ill advised pass across the front of the net.  Now the other team has the puck, and we are standing straight up, with no angle!  No matter which team has the puck, it is critical to follow it using T-Pushes and Shuffles WHENEVER it is inside our blue line.

In summary:  If the puck is at the other end of the ice, relax and watch it.  When it crosses the red line, take your stance.  As it crosses the blue line, DRIVE out on your angle (2 extra C-Cuts for a breakaway).  Once the puck is in your zone, use T-Pushes and Shuffles, and always stay in your stance.  Simple, right?

So many times I see young and old goalies alike "cruising" around their crease without using T-Pushes and Shuffles, caught off guard by quick breaks or turnovers, and rarely square to the shot.  By using these techniques every single game, not only will you look more focused and professional, but you are always prepared for a shot, and that is the first key to making a save! 

Tuesday, May 24, 2011

Goals Go Through Holes!

This article's goal is not to make you look good, it is to make you not look BAD!!!  Wait, what?

Follow the advice laid out here, and you won't just give up fewer goals, you will give up fewer bad, sloppy, embarrassing, costly, soft goals.  The most important quality that coaches look for in a goaltender is consistency.  You don't need to win every game for the team by standing on your head---as long as you don't lose games for the team by giving up bad goals.

The five holes of a goaltender refer to the best places to shoot against a traditional (old school) stand-up goalie.  The first four represent the corners of the goal, low and high.  The fifth hole is a bit more infamous, and we all know where that one is. 

Here is a picture of an old-school shooter tutor, with the five holes clearly open for business.  I bet "the great one" scores them all from there!

With today's butterfly style, goalies often present a different target to the shooter.  Though the holes in the bottom of the net have shrunk, the butterfly does present some new holes to exploit.


The holes numbered 7 and 9 in the above picture represent shots that go over the shoulders and through the arms of butterfly goalies, using a traditional (not blocking) butterfly save.

To see even more clearly why these holes are where they are, take a look at this picture of Ronan Mobley's traditional butterfly below:

By keeping your hands up when you butterfly, you leave holes under your arms, and over your shoulders.  This is why the traditional butterfly should only be used on shots from the outside with no traffic.

I think we have all been beaten on a shot through the arm holes, and there is really no excuse for it.  If the shot comes through traffic, or is too close to react to, use a BLOCKING butterfly.  Though it is not as easy to control a rebound with this save, it is much easier to start from a tight closed position and react out than it is to start open and try to quickly close down.  Plus, it is always better to give up a bad rebound than a bad goal!

Now there is no way to get one under his arms. 

If a shooter makes a great shot over your shoulders or into the top corner, then your coaches, teammates, parents, and fans can live with it.  It's those lucky shots, that sneak through holes in your body that are so tough to stomach, and result in that collective groan from the crowd. 

Finally, I would like to put a new twist on the most dreaded hole of all, number five.  A goal "between the wickets" is the most embarrassing type of goal, and one of the main reasons for the advent of the butterfly save.  By displaying a big five hole to the shooter, then snapping it shut, goalies make a lot of tough saves look easy. 

Yet as goaltending has evolved, so has the shooter's mindset, and they have discovered a pesky new technique for beating us down the middle without ever lifting the puck off the ice!!!  Many goaltenders will forget to control their sticks when butterflying, and this can lead to embarrassing goals in three ways.

1) The stick hits the side of the blocker side pad, causing it to hop off the ice for a split second and allowing the puck to pass through.

2) The stick slides toward the glove side pad as the blocker closes down, giving the appearance of a check mark, and opening the hole between the heel of the stick and the five hole.

3) The stick gets too low to the ice, and creates a ramp for the puck.  Though these shots don't go through the five hole, it can be even more embarrassing to put one in your own top corner.

To avoid these goals, make sure that the blade of your stick slides STRAIGHT forward when you butterfly, and that the paddle never touches your pads.  Also, make sure that your hands never drop below your pads, creating the embarrassing ramp effect. 

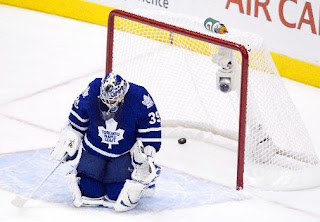
Even top pros give up the occasional soft five hole goal.  Where was your stick J.S.G!?!?

Bad goals can deflate a goaltender's confidence, not to mention that of his coaches and teammates.  By perfecting your butterfly, you can reduce the possibility of these goals sneaking in drastically.  A team always plays better when they know that their goaltender will keep the soft ones out!

Monday, May 23, 2011

Next Save, Next Save, Next Save

When elite athletes are performing at their best, they find themselves in a state of zen-like concentration often referred to as "The Zone".  To perform well as a goaltender, it is absolutely critical that one be able to concentrate and focus at will.  Just like every other aspect of your game, the mental side must be developed over many years with practice.


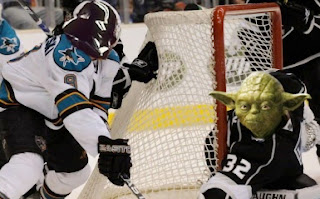
The Zen-master in action, Yoda's save percentage is up since trying my visualization technique!!!

You don't have years, though.  Isn't there a shortcut?  Of course!  By practicing this technique over time, you will get better at it, but even the very first time you use it, you will see guaranteed results, or your money back!

Goalie coach Jim Park used to tell goaltenders in his famous (and very old school) video "The Puck Stops Here" that he would visualize a puck sitting on a sheet of ice for 15 minutes before every game.  Nothing else in his head but a white sheet of ice and a puck.  This is how I start my mental preparation technique (I recommend you spend only a minute or two on this), but then I take it a step further.  Once I can clearly envision the puck in my mind, I start to imagine opposing players passing it back and forth.  As they do so, I visualize myself T-pushing back and forth, staying square to the puck, using perfect technique, my hands leading my body.  Next, I start visualizing shots.  Every type of shot from every location on the ice.  Each time I see myself making a perfect save, controlling my rebound, quickly recovering to my feet.  After each save I imagine, I say "Next Save" and move on to my next visualization.  If I know the team I am facing, I imagine their best players, and what types of shots they will likely take.  I save each perfectly in my mind and move to the next save. 

Martin Broduer, NHL legend, uses a similar technique.  He is quoted as saying that he has never been beaten by a shot he visualized saving before the game.  I recommend that you spend about ten minutes going through this exercise before you get in your car to drive to the rink, and for another ten minutes in the locker room.  When you are done with the visualization exercise, open your eyes and say, "I have done everything I can to prepare myself."  Your teammates might think you're nuts, but they probably do already (aren't all goalies?).  This technique helps to calm the mind and prepares you to enter "the Zone".  Though some players may benefit from firing themselves up, remember, they operate in quick and violent shifts, where as we are in it for the long haul.  Our job is different from their job, and so is our ideal mindset.  A "pumped up" goalie is the first to overreact and make a mistake where a calm focused goalie would not.

Once the puck actually drops, the "Next Save" mantra starts.  It is important when the puck is in the other end of the ice to not let your mind wander.  Hockey is the quickest game on earth, and especially in a game your team is dominating, it is easy to lose focus momentarily, and end up unprepared for a quick break.  To keep yourself dialed in, repeat the mantra, "Next Save, Next Save, Next Save."  This simple saying keeps your mind constantly alert to danger and ready to react to whatever comes at you next.  As you repeat it (in your head, obviously) you should be aware of not only where the puck is, but where the opponents without the puck are, using your intuition to anticipate chances before they happen.

A second advantage of this technique, is that it allows you to easily forget a mistake and move on to the next play.  If you give up a bad goal, your mind can enter a spiral of negativity: I blew the game, my team hates me, we won't make playoffs, I'll lose my scholarship, my girlfriend will dump me and on and on and on.  By always concentrating on your next save, you can easily brush off mistakes and focus on correcting them after the game or at your next practice, whenever the time is right. 

A final advantage of this technique is that it adds consistency to your game.  By repeating the same thing over and over every time you are on the ice, it makes every game feels the same.  The most important playoff game is prepared for the same way as a preseason warm up.  You will never get too stressed out or nervous, because, like always, you are simply focused on your next save, and you have repeated your routine.

The bottom line is this:  if you add two ten minute visualization sessions to your pregame routine, and repeat the phrase, "Next Save, Next Save, Next Save," during your next game, you will undoubtedly play better hockey and make more saves.  The more consistently you do it, the better you will get at it, and the easier it will be to find "the Zone" every time that you step on the ice.  

Friday, May 20, 2011

Angles are Everything

What if I promised that if you read this article and followed my advice that you would NEVER get beat over your glove hand again?  If you don't believe me, then you don't understand angles as they apply to goaltending...yet.  Once you do, I promise, you will not only be seen as "that goalie with the great glove hand" but a goalie who gives up a lot less goals!  Take my word, this article will completely change the way you look at the position...

To demonstrate how angles affect goalies, I have enlisted the help of ten year old stand-out Ronan Mobley.  If a ten-year-old's glove covers the top corner, I bet yours does, too!

The first key to understanding angles, is that it does not matter what the shooter sees, only what the puck sees, because the puck travels in a straight line.  To demonstrate what I am talking about, look at the pictures below.

The above picture shows that Ronan is only a foot or two off of his goal line when these pictures are taken.  You can see he has a solid stance, with his hands and stick well in front of his body (taking away a little extra angle from the shooter), and his weight is well balanced over the balls of his feet.

This photo show a shooter's eye level view of the goal.  Notice that most of the net the shooter sees is above the hands.

 Now here is the view that really matters: the puck's eye view.  As you can see from this angle, Ronan has the top of the net well defended, even though he is not out on a big angle, and his hands are at a normal height.

The blue line in this picture represents the what the shooter sees, and the red line indicates the path that the puck would have to travel to get there.  As you can see, to get to the top shelf, the puck would have to go directly through Ronan's glove.  There is absolutely no way to get over it!

The last two pictures are meant to demonstrate how effective a blocking butterfly save can be at taking away most of the goal, even when utilized by a ten-year-old goalie, that stands well below five feet tall. 

From a shooter's eye view, there is plenty of net to shoot at above the shoulders and gloves.

In reality, from a puck's eye view, nearly the entire net is covered.  This is what makes the blocking butterfly such an effective save for point blank shots, and shots that come through traffic.

A common mistake that nearly every goaltender makes is to drop his hands as the play nears his goal.  The next time you are in net, and a shooter winds up, see if your hands don't drop, and your knees don't bend a little extra in preparation for a shot.  It is this inadvertent human reaction that opens up that top corner above your glove and blocker.  As you can see from the pictures, the further in front of your body your hands are, the more impossible they are to beat over the top. 

If you have a basic understanding of angles, and make the conscious decision to keep your hands out in front, then you will NEVER be beaten top cheese again...now how SWEET is THAT!?!?!?


Thursday, May 19, 2011

Snap Your Butterfly!

The bread and butter of any modern goaltender's repertoire is the butterfly.  French-Canadian super-star Patrick Roy, perhaps the greatest goaltender of all time, pioneered the butterfly style in the NHL, thus the term "Quebecois Butterfly Style".  It is so common, that it is utilized for as many as 90% of some goaltender's saves.  It is so effective, that it has led to the NHL changing rules (narrower pads, smaller creases, etc), because it is so difficult to score against a well-trained butterfly goaltender.

No holes here!  Patrick Roy, the master at work.

There are many variations to this one save, too many in fact to write in one article.  Today I will be discussing butterflying from a set stance, square to a shot, as opposed to sliding into a butterfly.  I will first explain why the butterfly is such an important save.  I will then discuss the proper way to "snap" a butterfly.  I will finally differentiate between a traditional butterfly save, and a blocking butterfly.

Are you a gambling man?  The best goaltenders are.  The best goaltenders gamble that the shooter can't make a "perfect" shot---which is basically the only way to beat a well placed butterfly save.  The basic idea behind the butterfly save is to drop to one's knees to take away the majority of the bottom of the net.  A perfect shot may sneak just outside the pad, but the goaltender can always guide the puck away with his stick, or extend a pad to save this shot.  The goaltender's body covers the majority of the remaining goal, with his hands and arms free to police the upper corners. 


Textbook extended butterfly save from Roy.  Just got it by a toenail!

MYTH EXPOSED:  I can't believe how often I hear parents complaining that a young goaltender, "goes down too much."  If they watch an NHL game they would see that almost every single shot elicits a butterfly save from the goalie.  In a perfectly executed butterfly, the goaltender's shoulders will only drop a few inches, so the difference in height from stance to butterfly is minimal.  The real problem is that young goalies are shorter, and therefore need to come out further on their angles.  The shorter you are, the further you need to play out! 

Halak (on the right) needs to come out further to cover the same amount of net as Price (on the left).  To me, they both look a bit unbalanced up top.  I'm surprised they aren't sitting up taller with even shoulders...get it together pros!!!

The way that one would say they "save" a shot, or they "make" a pass, they should say a goaltender "snaps" a butterfly.  If there is one piece of vital information to take away from this entry, it is that when you butterfly, your knees SNAP down together (as pictured above).  Flexibility varies greatly in goaltenders, and many goalies try to compensate for poor knee flexibility by butterflying with their knees apart, but remember....

GOALS GO THROUGH HOLES!!!

The key to a solid butterfly is that the knees SNAP together TIGHT.  If you aren't the most flexible, you will need to use the extended butterfly save more often, but it is much easier to extend out away from your body than it is to squeeze together.  Another common mistake is what I call a lazy butterfly, where only 1 knee hits the ice, and the other comes only 80% of the way down.  I think we've all been burned by a lazy butterfly, and there is really no excuse for it. 

It is imperative that your butterfly is 1) snapped and 2) tight--no holes.

The final thing I want to do in this entry is differentiate between a traditional butterfly and a blocking butterfly.  In a traditional butterfly, the hands don't move from where they were in the stance, up and out in front of the body.  This gives our hands and stick the best opportunity to react to the shot coming at us.  We will use this butterfly anytime a shot comes in from outside, with no traffic.

A traditional butterfly makes it easy to pick off high shots with your hands, or control rebounds with your stick.

In a blocking butterfly, the hands drop to the tops of the pads, and our arms suck in tight to our sides.  The blocking butterfly is extremely popular, because it eliminates all holes in the goalie's body.  The downside to this save is that it makes rebound control tricky, and should really be used only for point blank shots, or shots through screens or traffic in front.  This save makes your body as big as possible and dares the shooter to go around it.

Halak and Price take notes!  It would require a pretty special shot to beat his blocking butterfly.

PRO SECRET:  Many times players will try to go over the glove hand of a goalie in a blocking butterfly.  Swinging a glove up in a waving fashion is way too slow (wave good-bye to that shot!), so instead, we use a technique called the "chicken wing."  In this save you lift your elbow up quickly, so that the side of your arm  stops the shot.  While its nearly impossible to control a rebound this way, it's much quicker than swinging your glove, and keeps your shoulders square to the shot.

TJ keeps a high one out with a chicken wing save.

The butterfly should be used for any shot below your waist, any point blank shot, any one timer, and any shot through traffic.  Basically, almost every shot you see should be met with this basic technique. 

Times have changed for goaltenders. In the 80's and 90's goalies were doing the splits, stacking their pads, diving across and flopping about, making the position look stylish and exciting, and something only an acrobat with catlike reflexes could master.  In contrast, today's butterfly goalies make the position look easy--if not boring.  They find their angle, set their feet, snap their butterfly, recover to their feet, and repeat.  Sure it's boring...but it's effective!  I'm not sure how fans feel about it, but coaches will pick the boring guy that keeps the puck out of the net any day of the week!

Wednesday, May 18, 2011

The Hands Lead the Body

Now that we have addressed the legs, the foundation of strong goaltending, we will address the key to save making: the hands and stick.  As a goaltender, you would ideally want to make EVERY SINGLE SAVE with your hands or your stick.  Is this likely, or even possible in a game?  Probably not.  However, if you make it your goal to get your hands on every shot off the ice, and your stick on every shot on the ice, you will be a much improved net-minder, because THE HANDS LEAD THE BODY.

With every movement you make in goal, your hands should always be first. When you shuffle or t-push, for example, your hands should go to first, then your body should follow behind.  Your hands are much faster than your feet, and you may make a couple of saves by having your stick or glove quickly across, even if your body isn't there yet.  Also, by keeping the hands always out in front of the body, we take an extra foot or so of angle away from the shooter without having to come any further out of our net.  Top goaltenders attack every shot with their hands, and feel as if their hands "pull their bodies" into saves and slides.


This goalie's hands are leading his body in a T-Push (but his stick SHOULD be on the ice).

A good goaltender can block a shot.  A great goaltender controls shots by making saves.  If a puck hits you in the leg pads, chest, arms, skates, or head, and the subsequent rebound ends up in the corner, consider yourself lucky!  The only way to control rebounds consistently is through trained usage of the hands and stick. 

The glove hand (which we will cover in depth in later articles) is our fastest asset because it is not weighed down with a stick or heavy pads.  It can control rebounds by catching shots on the glove side, trapping them against our body or blocker, and helping the blocker to guide them away.  Shots to the blocker side must always be attacked with two hands. 

The blocker's job is to attack the puck, then rotate with the shot to guide the puck to safety in the corner.  Shots tight to the body can be controlled by trapping the puck on the blocker with the glove.  The glove can also assist the blocker to rotate to better control rebounds.

PRO SECRET: NEVER rest your hands on your pads when you may face a shot.  The hands must be able to move freely in either direction instantly.  Resting hands are slow hands!!!

This goaltender's hands take an extra two feet of angle away from the shooter, and are ready to move freely to the save.

The stick is our most valuable asset.  We are, after all, hockey players.  There are two places the hand should ever be on the stick: at the base of the shaft, with one finger on the paddle (so the stick doesn't rotate in our hand) or at the top of the shaft (for poke checks, sweep checks, and puck handling).  The hand is NEVER in the middle of the shaft.  This is an issue I see with many of my men's league goaltenders that must be corrected immediately.  A goaltender's stick should also never be cut, as the balance built into the stick is more important than the height.

The stick starts at a slight angle, creating a ramp effect that launches the rebounds up and away from the net.  It moves in a semi-circle around the goaltender so that the heel and toe of the stick stay on the ice at all times.  Once you have mastered this movement, controlling low shots will feel natural, and the stick should save EVERY SINGLE shot on the ice.

PRO SECRET:  Start the stick with the heel just in front of the blocker side pad.  This accomplishes two things.  1)  It keeps the blocker from resting on top of the leg pad (it should always be outside the leg pad maximizing the amount of net coverage) and 2) It is much harder to move your stick quickly to the blocker side.  Keen players often beat goalies between the heel of the stick and the toe of the blocker side pad.  This secret of the pros eliminates the possibility of an embarrassing 5-hole goal.

This gap between the heel of the stick and the blocker side pad is an enviting target for today's snipers.  I know where I would shoot!!!

Good hands in a goaltender can often make up for lack of positioning or technique, and they can bail us out of some hairy situations.  By attacking every shot with your hands or stick, you will not only make more first saves, but better control your rebounds.  Think of your hands and stick as your first line of defense.  Your body and pads are just back-ups!

Tuesday, May 17, 2011

The Foundation of the Stance

A journey of a thousand miles begins with a single step, and if this journey is to improve your goaltending, then that first step is to take a look at your stance.  In this post, I will focus on the legs, which are the foundation of the the stance.

Balance is absolutely vital to good goaltending.  As a player begins to shoot, it is ideal to be absolutely set in your stance, with your weight balanced over the balls of your feet.  If you are too heavy on your toes, you will fall forward into the shot, and much like a head on collision between cars, if you are moving towards a shot, you have less time to react to it.  Also, if you are moving forward, it is impossible to move left or right to get your body behind the shot.  If you are too heavy on your heels, you will likely end up with your rear-end on the ice, flopping about like a capsized turtle.  If you get lucky and the shot hits you, there is no chance of controlling the rebound, or making a second save. The proper balance of weight over the balls of the feet, gives the goaltender the best chance to quickly move into the shot. 

The second key to quick movement and reaction time is finding the correct bend of the knees.  There is no science to this, because each goaltender is different.  The way to find the right amount of knee bend for yourself is to set your feet slightly wider than shoulder width apart, then pretend you were going to jump up in the air as high as you can.  If you are doing this right, you'll feel some tension in your thighs and rear, and your weight will balance naturally over the balls of your feet.  This means that your muscles are loaded (like a compressed spring) and are ready to explode into action.  By setting yourself like this, you are ready to drive in any direction with speed and efficiency or snap your knees to the ice for a butterfly save.

By finding balance in the stance, we prepare ourselves to drive into saves as opposed to diving into saves.  We set ourselves up for success in not just stopping the shot, but controlling the rebound, and recovering quickly back to the stance.  Find proper balance in your stance, and watch your GAA drop dramatically!

Dialing in a balanced stance with Squirt A Champion of California Tomas "TJ" Leet.